
An AI model photo generator turns a single flat garment photo into polished on-model shots — no studio, model, or shoot to book. You upload your product image, the AI renders it on a realistic virtual model in seconds, and you publish. This guide shows how to do exactly that from Claude, using the Dreem MCP, step by step.
What are virtual model shots?
A virtual model shot — sometimes called an on-model or AI fashion model image — shows your garment worn by a digitally generated person. Instead of booking a model, a photographer, and a studio day, you generate the same hero image from a product photo you already have.
For apparel brands, on-model imagery is the shot that sells. Shoppers want to see how a piece sits on a real body: the fit through the shoulders, the length, the way a fabric falls. Flat lays and packshots show the product; an on-model shot shows the promise. Traditionally that meant a casting, a booking, and a few hundred dollars per look. An AI model photo generator collapses all of that into an upload.
Why generate them from Claude with the Dreem MCP
Dreem is a product-photography engine built for apparel and wearables. It exposes its tools through an MCP server — the Model Context Protocol, the open standard that lets AI assistants like Claude call external tools directly. Connect the Dreem MCP once, and you can ask Claude, in plain language, to generate on-model shots, ghost-mannequin images, packshots, or video from a single product photo.
The payoff is that generation happens inside your conversation. There's no separate dashboard to open and no export-import shuffle between tools. If you already work in Claude, you can describe the shot you want, hand it a product image, and get a finished model image back in the same thread — then iterate on pose, talent, or framing without leaving the chat.
How to generate virtual model shots, step by step
The whole setup takes a couple of minutes, and you only do the connection part once.
Step 1 — Connect the Dreem MCP server in Claude
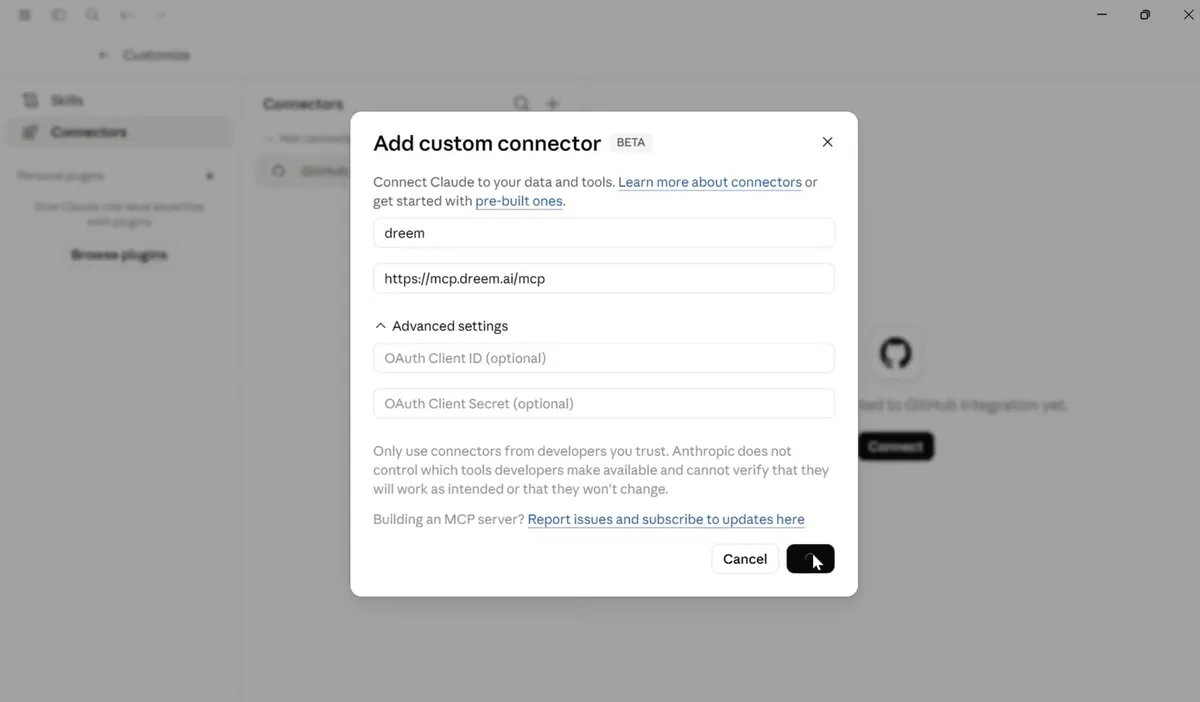
In Claude, open Connectors and choose Add custom connector. Give it a name — dreem — and paste the server URL:
https://mcp.dreem.ai/mcp
Leave the OAuth fields blank unless you have client credentials, then click Connect.
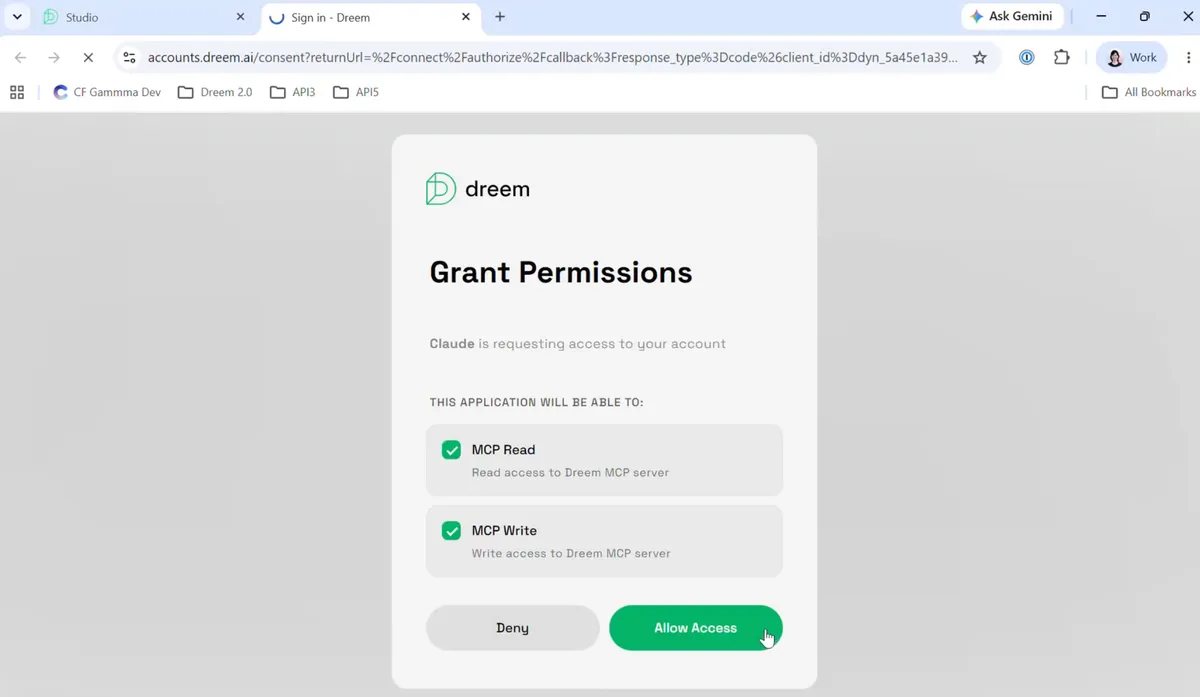
Step 2 — Grant access to your Dreem account
Claude opens a Dreem permission screen. Sign in — or create a free account — and approve the read and write scopes so Claude can send images to Dreem and pull the results back. Click Allow Access. You only do this once.
Step 3 — Prompt Claude with your product image
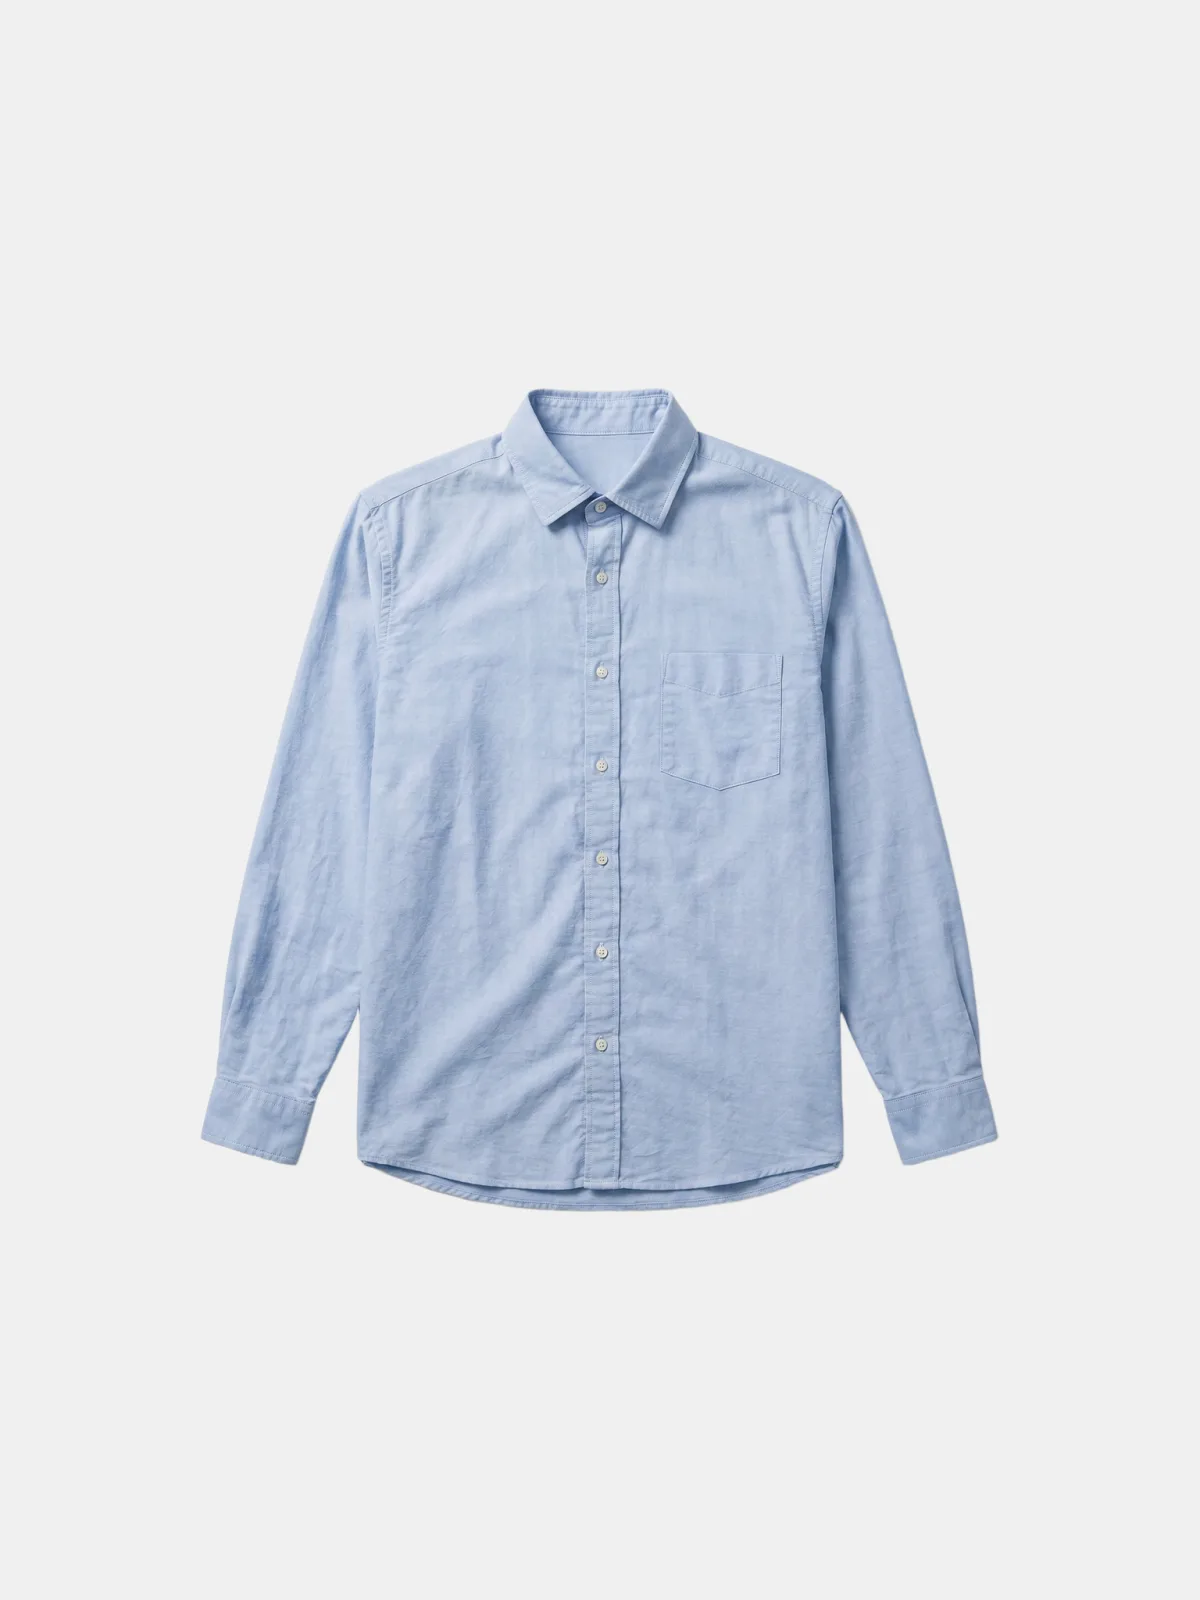
Start a new chat, describe the shot in plain English, and point Claude at your product image. A public image URL works well — for example a hosted PNG of a base garment:
generate virtual model with this input image: https://…/baseshirts/putih.png
Be as specific as you like about pose, framing, or talent, or let Dreem choose for you.
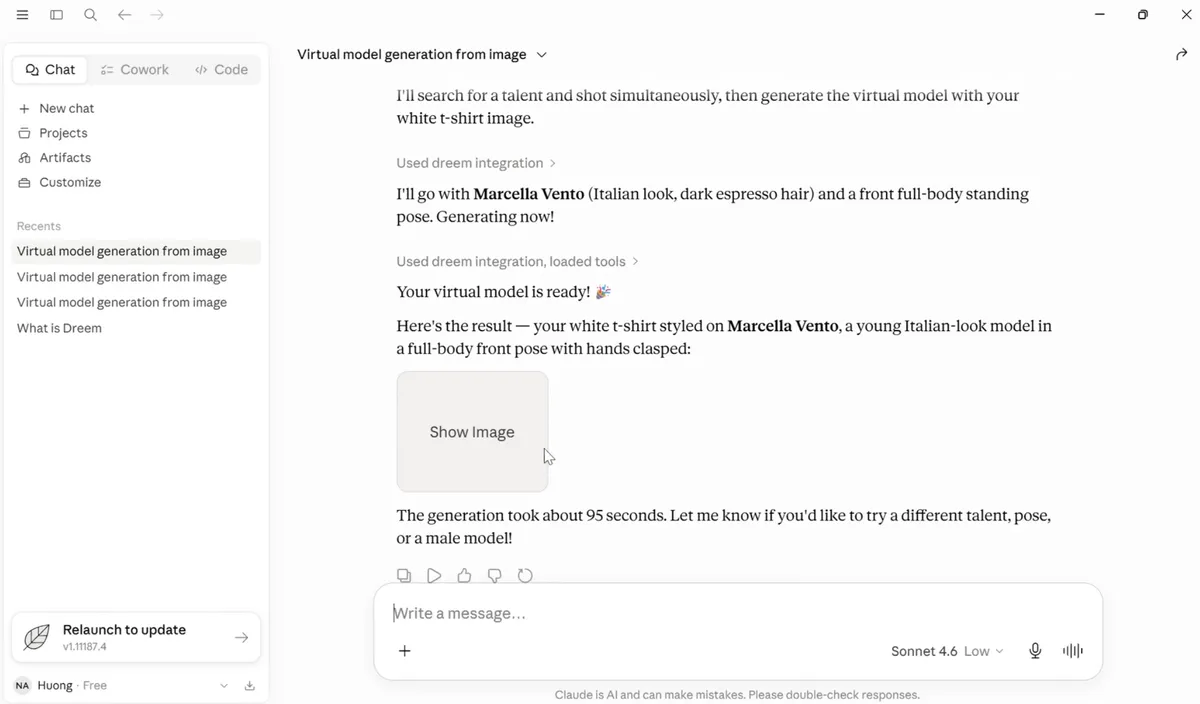
Step 4 — Get your virtual model shot back
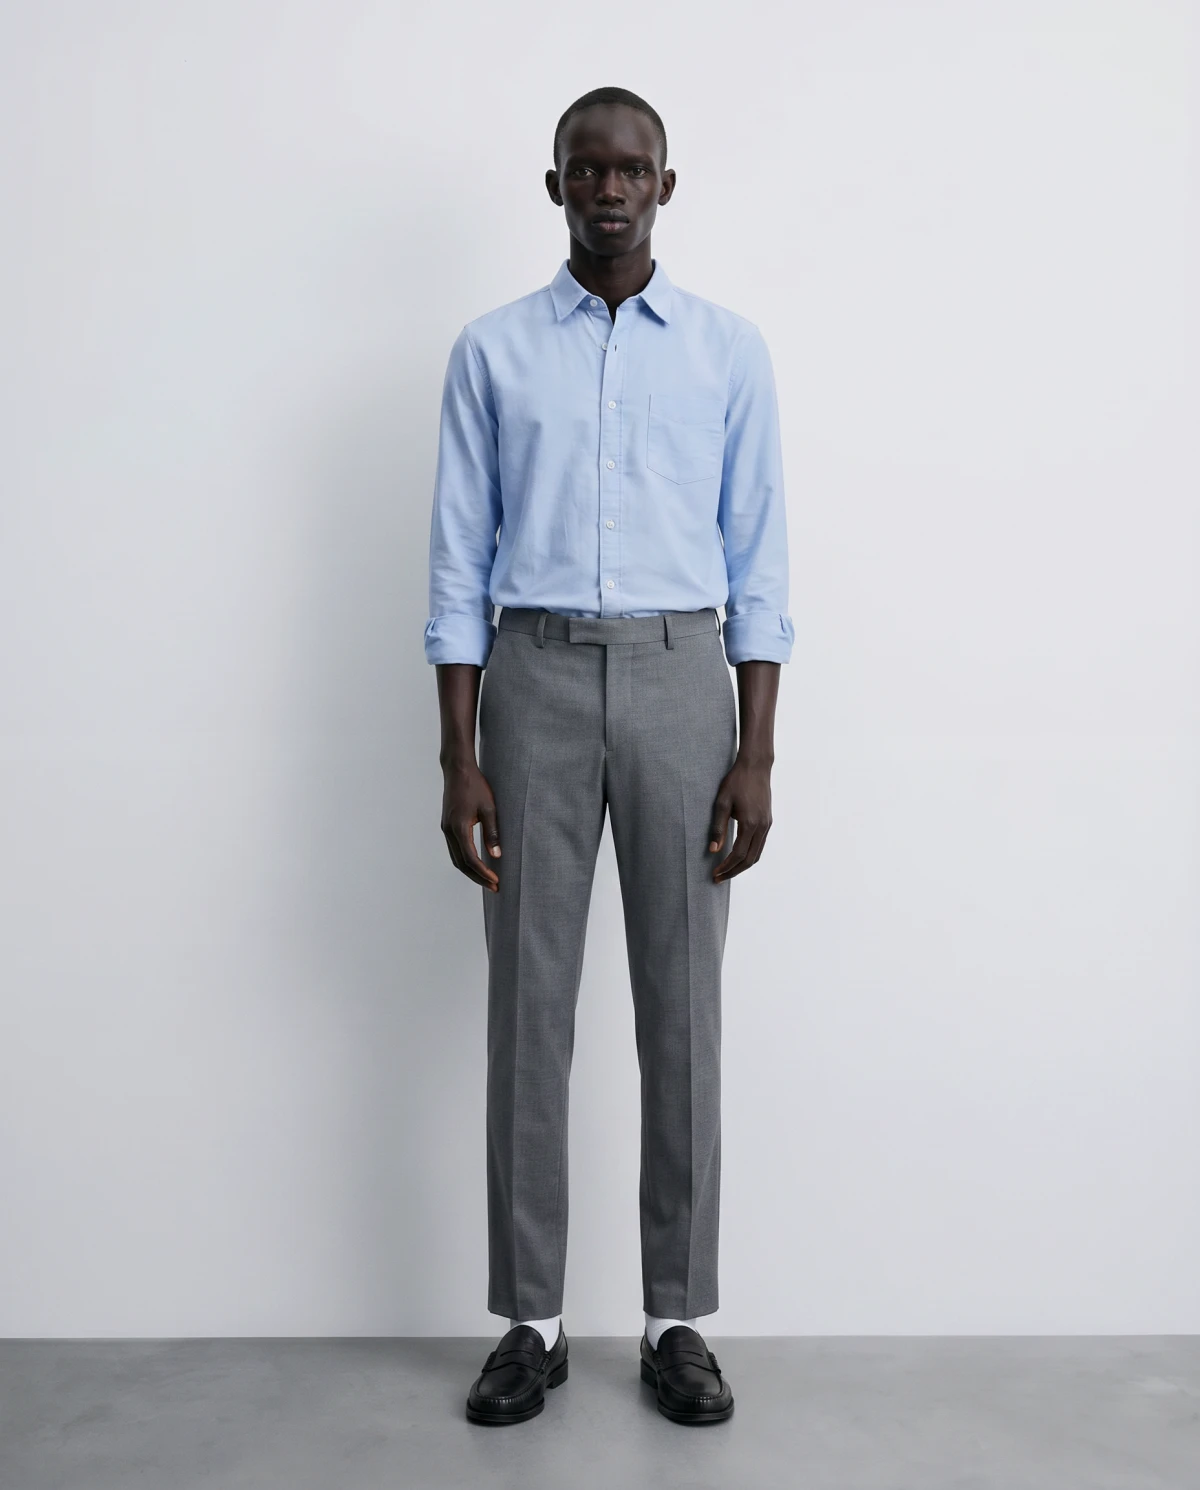
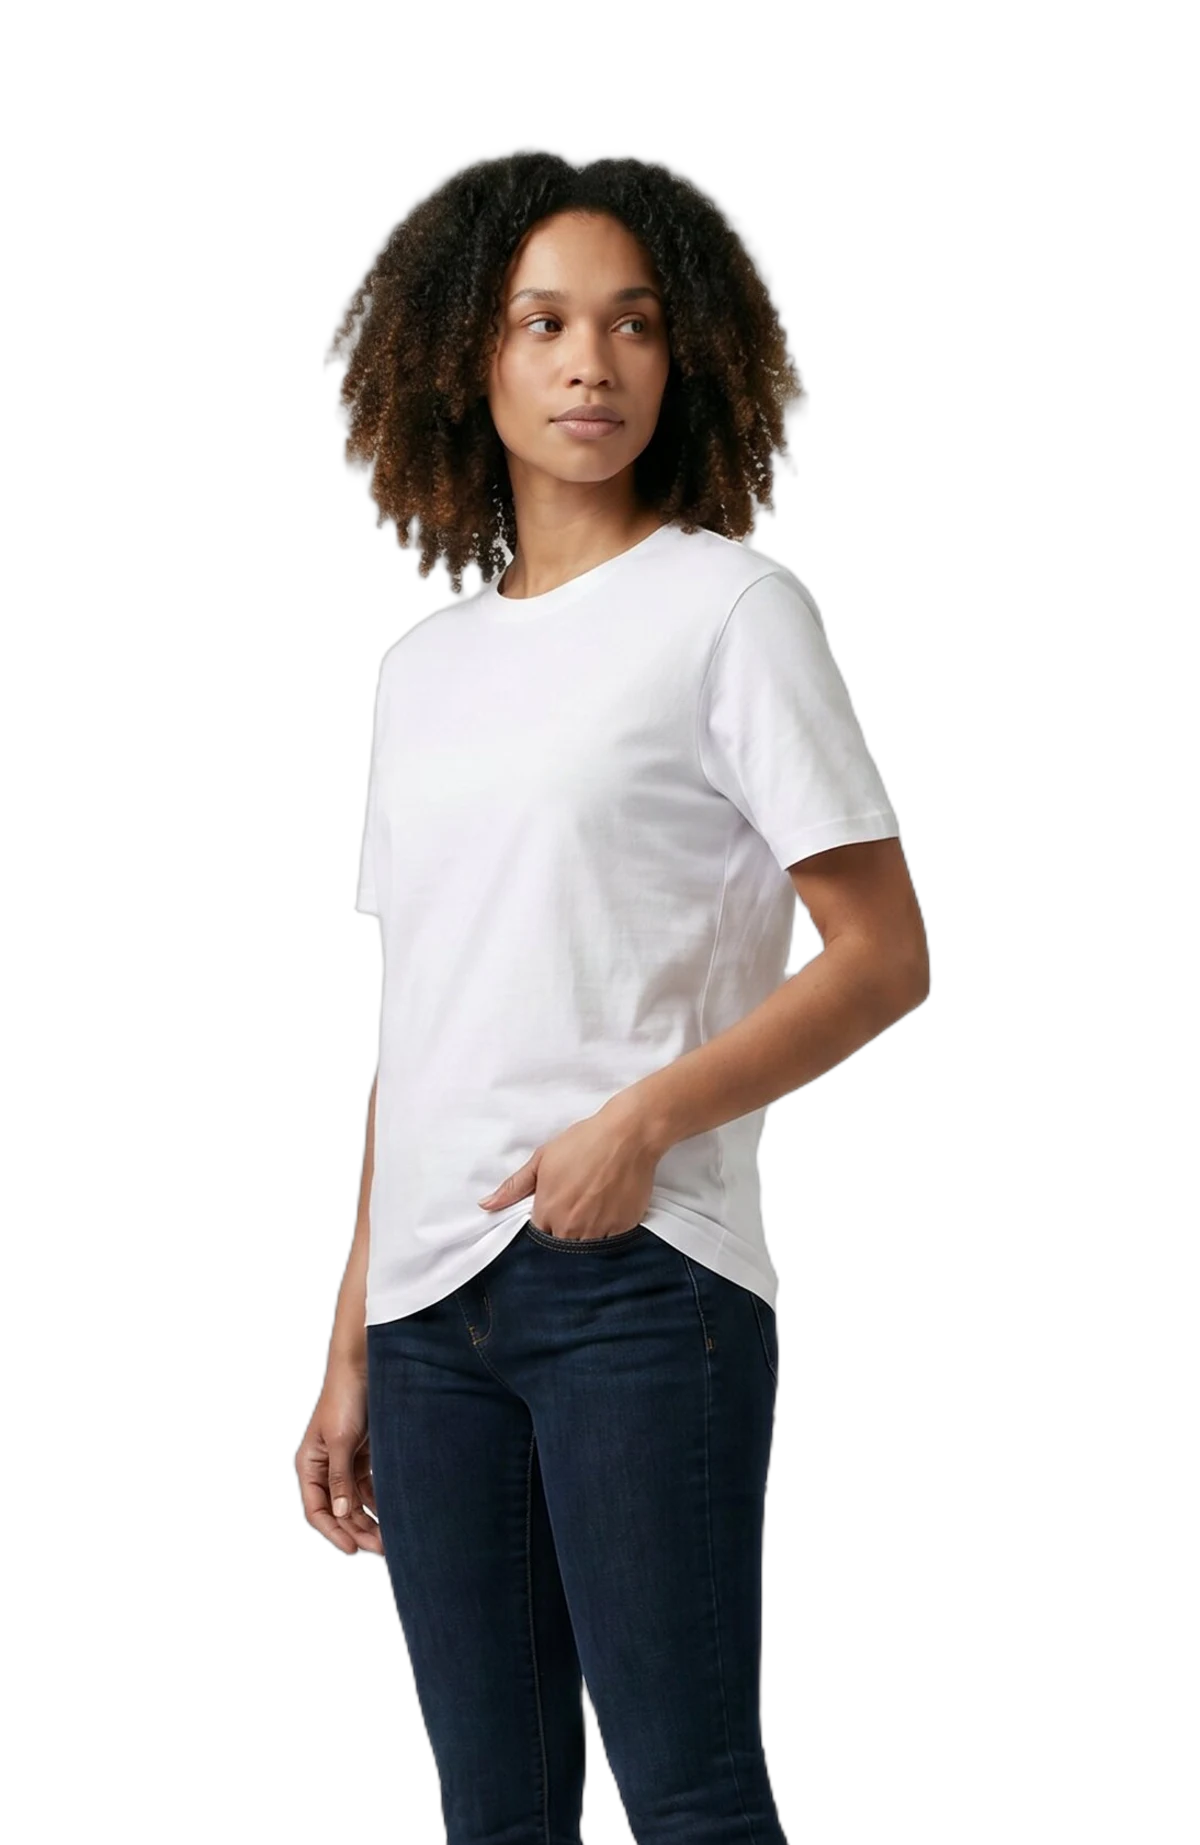
Claude calls the Dreem tools — selecting a talent and a pose, then generating — and returns the finished image right in the conversation. In this run it picked Marcella Vento, a front, full-body standing pose, and rendered the white t-shirt on her in about 95 seconds. Not quite right? Ask for a different talent, a new pose, or a male model in the same thread and generate again.
Tips for better results
- Start with a clean product image. A flat lay or packshot with even lighting and a plain background gives the generator the most to work with.
- Be specific when consistency matters. If a whole catalog needs the same look, name the pose, crop, and talent in your prompt so every SKU matches.
- Generate a few variations. It's quick — make two or three and pick the strongest rather than settling for the first.
- Keep one thread per product. Context carries within a Claude conversation, so follow-ups like "same model, back view" just work.
- Review the details. Fine logo detail and reflective surfaces are still improving — check the output before it goes live if a crisp logo is the hero of the shot.
Virtual model vs. ghost mannequin vs. flat lay
Not every product needs a person in the shot. Pick by what the shopper needs to see:
- Virtual model — when fit on a body is the selling point: dresses, knitwear, outerwear, anything where drape and proportion matter.
- Ghost mannequin — when you want to show structure cleanly without a person. The invisible-mannequin look reads great on a product grid, and you can generate it with Dreem too. See our ghost mannequin AI tool.
- Flat lay — when the design is the story, like t-shirt graphics or flat-pack basics, or for accessories that don't need a body at all.
Most apparel stores run a mix: flat lays for the quick catalog grid, ghost mannequin or on-model shots for the hero image on the product page.